TL;DR
In this episode, you’ll discover 5 Mac productivity hacks to help you reduce unnecessary clicks on your Mac.
To measure the number of clicks and cursor movement you’re experiencing on your Mac, I suggest installing the free app called Mouse Miles: https://www.pointworks.de/software/mouse-miles/
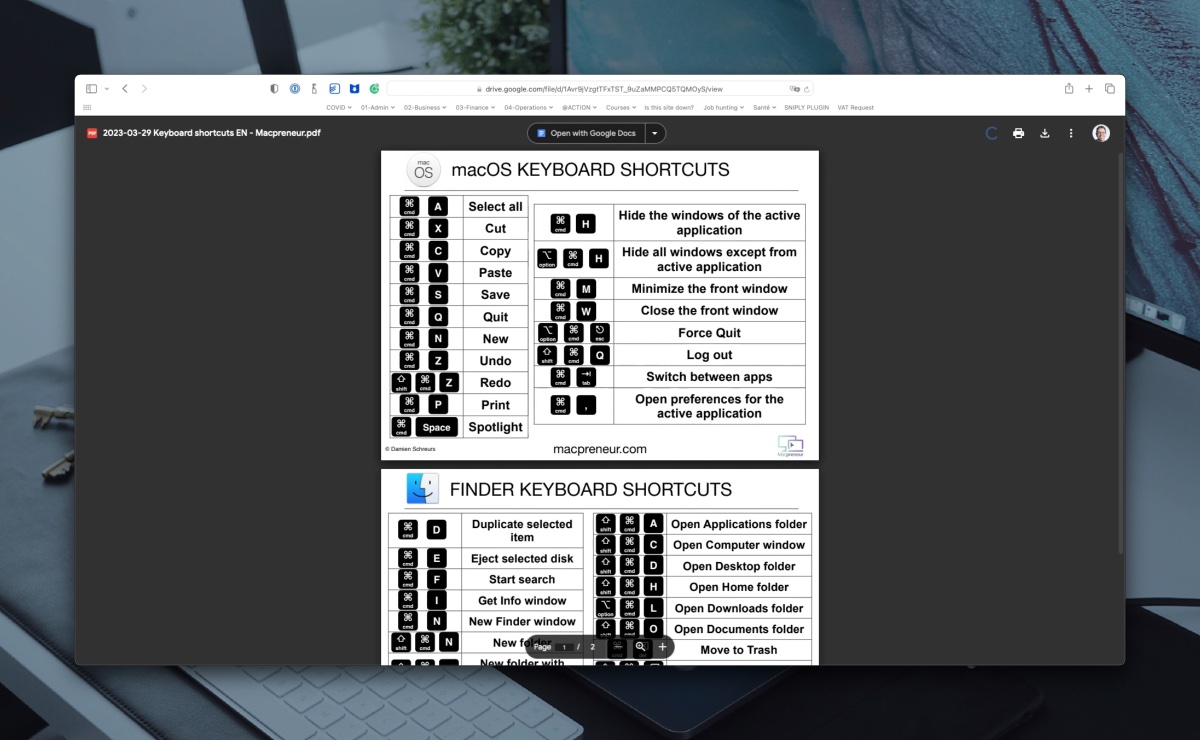
Here are 40 keyboard shortcuts that will help you reduce unnecessary clicks https://macpreneur.com/ks (no signup required):
Links to the third-party tools mentioned in this episode:
Curious to know how well you’re taming the 3 killers of Mac productivity? Take a free quiz at https://macpreneur.com/score
Summary
The episode discusses the importance of minimizing unnecessary clicks and provides tips and techniques to speed up operations on a Mac. It emphasizes the time lost through clicking and moving the mouse and introduces an application called Mouse Miles that records clicks, cursor distance, and keystrokes. I share shares my own statistics, revealing that I spent nearly 29 hours in five months just clicking and moving the mouse.
The first technique mentioned is folder pinning, which involves creating shortcuts to frequently used folders in the Finder sidebar. This allows for easy access to these folders in any open or save dialogue box.
The second technique is using keyboard shortcuts, and the author provides a cheat sheet with 40 keyboard shortcuts. They also introduce four additional keyboard shortcuts, including printing (Command P) and quitting an application (Command Q).
The topic then explores two new keyboard shortcuts for Finder: creating a new empty folder (Shift+Command+N) and previewing a document without opening it (space bar). It suggests manually exploring application menus to discover more keyboard shortcuts or using a third-party utility called KeyClu.
Next, the topic introduces App Shortcuts, a built-in solution for defining custom keyboard shortcuts at the operating system or application level. I explain how to access App Shortcuts in System Settings (macOS 13 Ventura or later) and System Preferences (macOS 12 Monterey or earlier) and provide examples of custom shortcuts for the Notes app and the “Save as PDF” feature.
Mission Control is highlighted as a built-in feature that allows users to quickly view all open application windows at once. It can be invoked through keyboard shortcuts or gestures on the Magic Mouse and Magic Trackpad.
Lastly, Hot Corners are discussed as a feature that allows users to configure actions when moving the cursor to the corners of the screen. Examples include Mission Control, hiding application windows, activating Notification Center, and starting the screen saver.
Takeaways:
- Minimizing unnecessary clicks can save significant time in the long run. ⏰💻
- Mouse Miles is an application that tracks clicks, cursor distance, and keystrokes. 🐭📈
- Folder pinning in the Finder sidebar provides quick access to frequently used folders. 📂📌
- Learning and using keyboard shortcuts can greatly speed up operations on a Mac. ⌨️🚀
- App Shortcuts allow users to define custom keyboard shortcuts at the operating system or application level. 📲⌨️
- Mission Control provides an overview of all open application windows. 🚀🖥️
- Hot Corners can be configured to perform various actions when moving the cursor to the corners of the screen. 🖱️🌈
- Exploring menus and using third-party utilities can help discover additional keyboard shortcuts. 📚💡
Full transcript
Intro
Hello. Hello.
Are you a solopreneur spending countless minutes clicking and dragging on your Mac? What if you could reclaim that lost time and amplify your productivity with just a few built-in features of macOS?
I’ll unpack all of this after the intro.
Welcome
If this is the first episode that you’re listening to, welcome to the Macpreneur Tribe.
Before diving into today’s topic, I want to quickly mention that this episode is part of a short series focusing on the three killers of Mac productivity and which are namely unnecessary clicks, repetitive typing and file clutter.
In episode 58, I introduced those three killers and I provided built-in solutions to combat each of them. In that episode, I also mentioned a free quiz that I’ve created if you want to quickly discover how well you are coping or taming those killers.
The quiz is available at macpreneur.com/score
now in today’s episode I will be focusing on reducing unnecessary clicks by going a bit deeper on features and techniques that come pre-installed with your Mac.
Problem
But before that, let’s recall why we should minimize unnecessary clicks. So as a solopreneur, every second counts yet many are unaware of how much time they lose by simply clicking and moving their mouse around. It might seem like a few seconds, but over days, weeks, and months, it accumulates.
Now, if you are curious, I recommend installing the application, Mouse Miles developed by Point Works software. This app will record every click or tap that you do, as well as the total distance traveled by your cursor and the number of keystrokes.
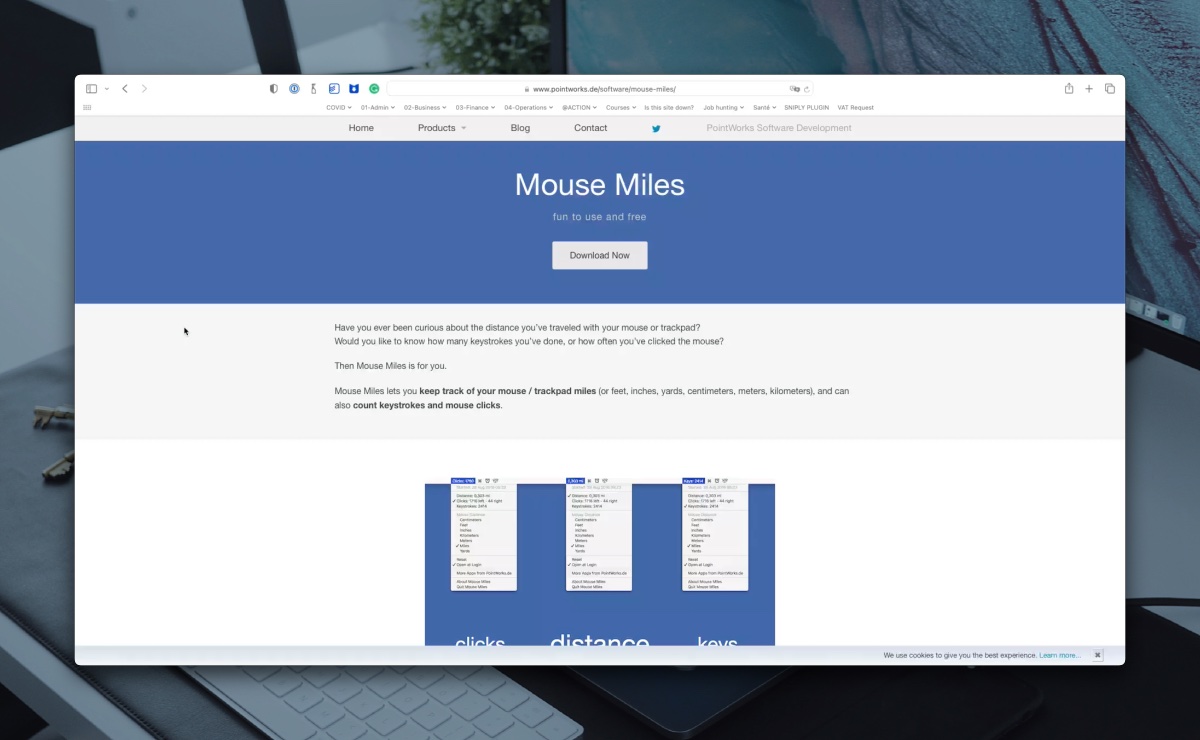
Now at the time of recording, this application has recorded roughly 36,000 clicks and a travel distance of about 6.7 kilometers or about 4.2 miles, all of that during a period of five months.
Assuming that the click takes about one second and that my mouse cursor travels at around 10 centimeters per second or four inches per second, all this activity has taken me almost 29 hours, that’s a little bit less than six hours every month just clicking and moving my mouse around.
Now with the techniques that I’m about to introduce, you won’t necessarily reduce the number of clicks, but you will dramatically speed up how you operate your Mac, allowing you to do more in less time.
Now the main reasons that we need to click and move the cursor around are to: first access and interact with files and folders or access, interact with applications and their windows.
Now in episode 58, I introduced two built-in solutions folder pinning and keyboard shortcuts, and today I will expand on them, but also talk about three more Built-in features of macOS: App Shortcuts, Mission Control, and Hot Corners.
Folder pinning
Now, the first built-in feature is called folder pinning, which means creating a shortcut to commonly used folders directly in the Finder sidebar.
When you open finder, you will see on the left the sidebar and at the top of the sidebar you will see the Favorites section. Now it may be collapsed, so you will need to click on the Chevron first to expand the favorite section.
To pin a folder, you just drag and drop a folder of your choice between two existing shortcuts and that will create then your own shortcut to the folder that you want.
And so accessing this folder will be as easy as just clicking in the sidebar on the left.
It’s very useful because this Favorites section is visible in any open and save dialogue box.
Keyboard shortcuts
The built-in feature number two are keyboard shortcuts.
If you have never taken the time to learn keyboard shortcuts, I can only encourage you to do so.
You can grab a cheat sheet in PDF format with 40 keyboard shortcuts at macpreneur.com/ks, and the best is there is no signup required. You visit the link, you have access to the PDF and you can download it immediately.
I won’t revisit the keyboard shortcuts introduced in episode 58, but instead I will give you four more.
Now two in macOS: if you want to quickly print something from Notes, from Safari, from Pages, Word, Excel. It is Command P for PRINT, and if you want to quit an application, it is Command Q.
A small side note, if you remember in the period 58, I talked about COMMAND tabulation to quickly switch between applications. It’s called the App Switcher in macOS. Well, when you are in the App Switcher, so you, you press COMMAND (⌘), then tab, tab, tab, and let’s say you highlight Excel, right?
Because the COMMAND (⌘) key is still pressed, if you press then Q at the same time, you will then be able to quit the application.
So you don’t need to activate it and quit it. You just invoke App Switcher with COMMAND (⌘) TAB, locate the application you want to quit, then Q.
So these were the two keyboard shortcuts for macOS.
Let’s go and explore two new keyboard shortcuts for Finder.
So whenever you want to create a new empty folder, it’s easy: it’s SHIFT+COMMAND+N (⇧ ⌘ N) .
And if you want to preview a documents or a file without opening it, you just press the space bar and it’s a feature called Quick Look.
And so you have maybe many Keynote files or Excel files in a folder, and you don’t want to double click to open each of them just to decide which one to open. You will then select the first one in the list, space bar, and if you, you are not sure about the one that you want, you just use the arrow keys.
If you press the down arrow key, it’ll go to the next file and it’ll quick look the next file.
Yeah. So these are the additional keyboards shortcuts.
Now, there are many more keyboard shortcuts than the 40 that are in my cheat sheet.
If you want to discover more keyboard shortcuts, one way is by manually visiting all the menus of the active application and looking at the right of every command.
So for instance, I’m preparing this episode now in Keynote. If I click on the Slide menu, I can see that creating a new empty slide can be done via SHIFT (⇧) COMMAND (⌘) n.
Now, regardless of the application that you use to pay the bills, could be Photoshop, illustrator, Logic Pro Word, PowerPoint, or even the Mail app. It doesn’t matter. I can only encourage you to see if there is a keyboard shortcut for the actions that you perform the most.
Now, there is another way to discover keyboard shortcuts for active applications, and it’s a totally free third party utility called KeyClu, K E Y C L U.
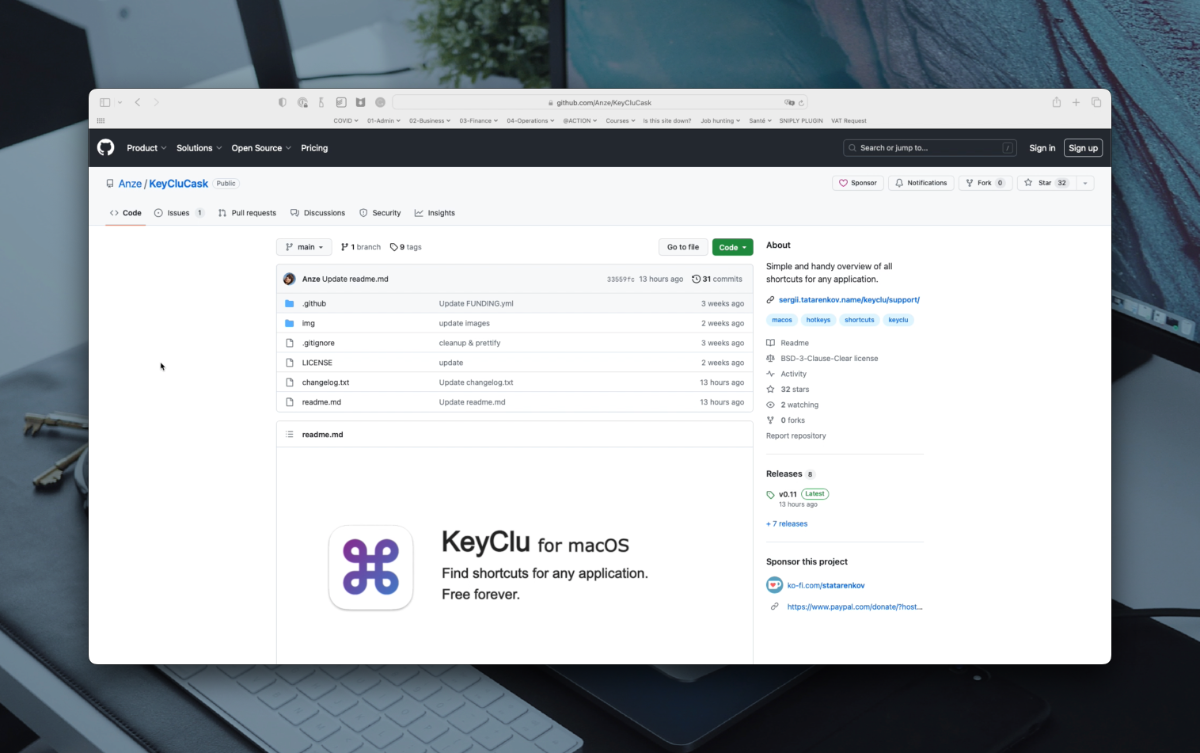
Once installed, all you need to do is press the COMMAND (⌘) key twice, then hold it. And a floating panel will appear showing you all the keyboard shortcuts for the active application.
It’s really a great way to quickly discover keyboard shortcuts.
Now it can happen that the action that you do the most has no keyboard shortcut associated to it.
App Shortcuts
Now fear not, there is actually a built-in solution called App Shortcuts.
This is why I love macOS so much because Apple gave us the ability to define our own keyboard shortcuts, both at the operating system level, meaning regardless from the currently active application, but also for any chosen application specifically.
Now, if your Mac is running macOS 13 Ventura, or later: you would then open System, Settings, then visit keyboard, then keyboard shortcuts, then App Shortcuts.
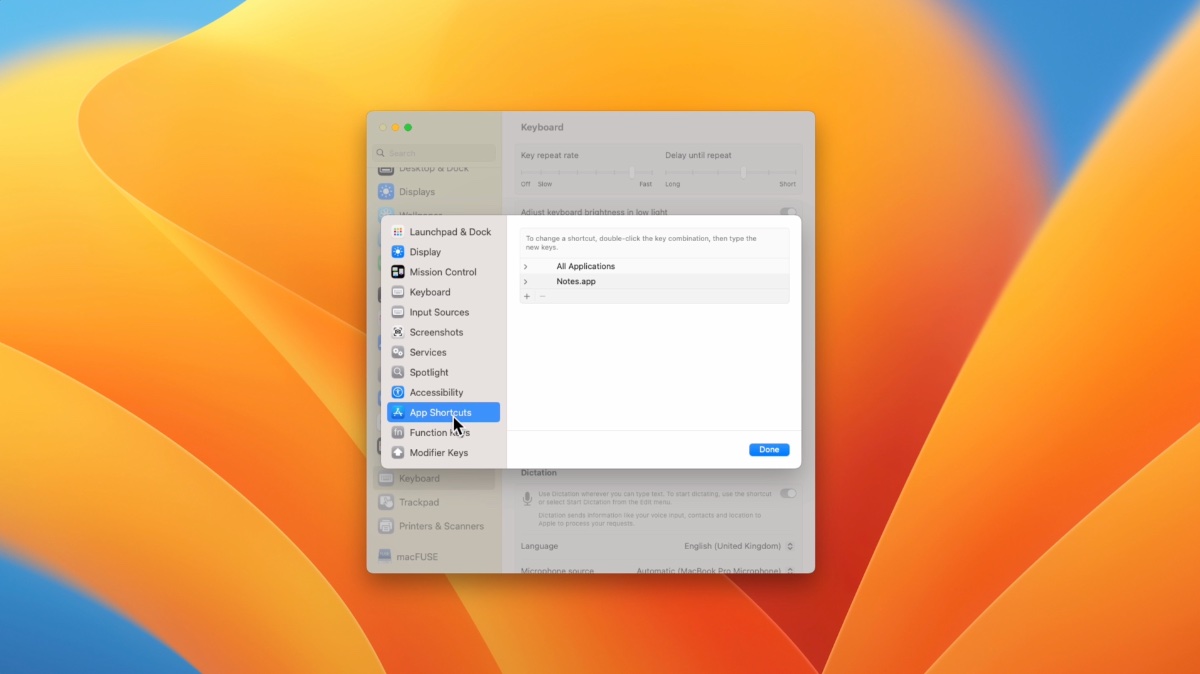
On macOS Monterey or earlier, it is System Preferences, then keyboard. Then you click on the shortcuts tab, and there you will see in the list App Shortcuts.
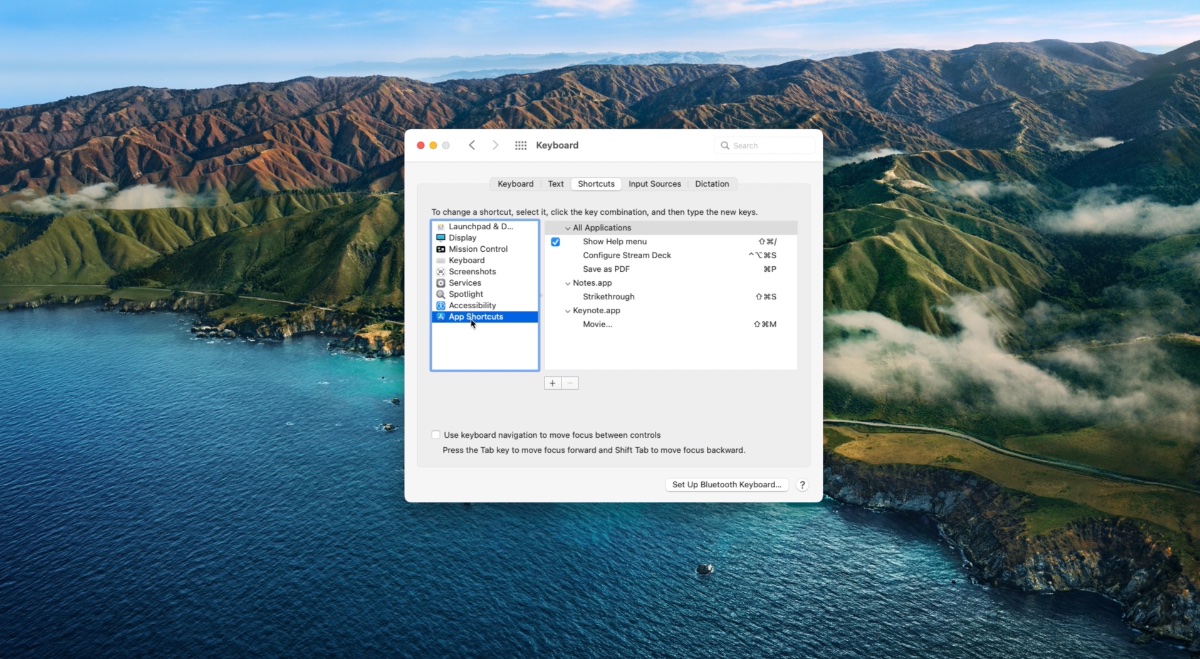
Here are two examples that I have implemented on my iMac.
So for the Notes app, I often use the Strikethrough formatting. Now if you open Notes and you go to the format Menu, then you click on font and you will see Strikethrough and you will notice there are no keyboard shortcuts for that.
And so I was able through App Shortcuts to define my own keyboard shortcut, and in my case, I defined SHIFT+COMMAND+S (⇧⌘S).
Why?
Because COMMAND (⌘) S is already taken, it’s “Save” and to select text easily, in macOS, it is SHIFT (⇧) COMMAND (⌘) and then the arrows. So SHIFT (⇧) COMMAND (⌘), right arrow will select the entire sentence. And so because I al I’m already doing SHIFT (⇧) COMMAND (⌘), right arrow, I just need afterwards to press the S key while keeping the SHIFT (⇧) COMMAND (⌘) pressed. I.
So that’s one example. Another example, and that’s available for all applications.
I’ve redefined the keyboard shortcut COMMAND (⌘) P for the print as PDF features.
So you might not know that, but whenever you are in a print dialogue box, at the bottom there is a little PDF button. You click on the small chevron, and there you will have an option “Save as PDF”.
So basically on your Mac, you can create PDF documents from any application.
The, the problem, or the thing that I realized was that that “Save as PDF” has no keyboard shortcut associated to it.
And so by redefining a new keyboard shortcut saying that, at the operating system level, COMMAND (⌘) P is “Save as PDF” as well.
Now because that “Save as PDF” only appears in the print dialogue box, it doesn’t conflict with the existing COMMAND (⌘) P.
So the workflow I have now to quickly create a PDF is: I do COMMAND (⌘) P once and that invokes the print dialogue box, and then I do COMMAND (⌘) P again and it saves as PDF.
Mission Control
A fourth built-in feature that I would like to mention in this episode is called Mission Control.
It’s the ability to quickly see all the opened application windows at once.
Now, if, like me, you tend to have a lot of applications open at the same time, your screen will soon get littered with overlapping windows. So finding the one that you’re looking for might be a challenge.
There is always the COMMAND (⌘) tab option, but in some cases it’s not enough.
And this is why Mission Control is really a, a godsend in my opinion.
It’s a quick way to have an helicopter view of all the active windows on your Mac.
One way to invoke Mission Control is simply to press the F3 key of the keyboard.
Another way is through a keyboard shortcut CONTROL + UP ARROW.
It’s also possible to invoke Mission Control from the Magic Mouse or the Magic Trackpad.
So on the Magic Mouse, you would double tap with two fingers, and on the Magic Trackpad, you swipe up with three fingers.
You might need to visit System Settings or System Preferences, then “Mouse” or “Trackpad” to activate those gestures.
Hot Corners
And finally, the fifth built-in feature that I want to talk about in this episode is called Hot Corners.
Now, if you didn’t change anything, and your Mac is running, at least macOS Monterey, if you move the cursor to the bottom right corner of your screen, it’ll open a quick note window. That’s an example of a hot corner, except that it has been defined by Apple.
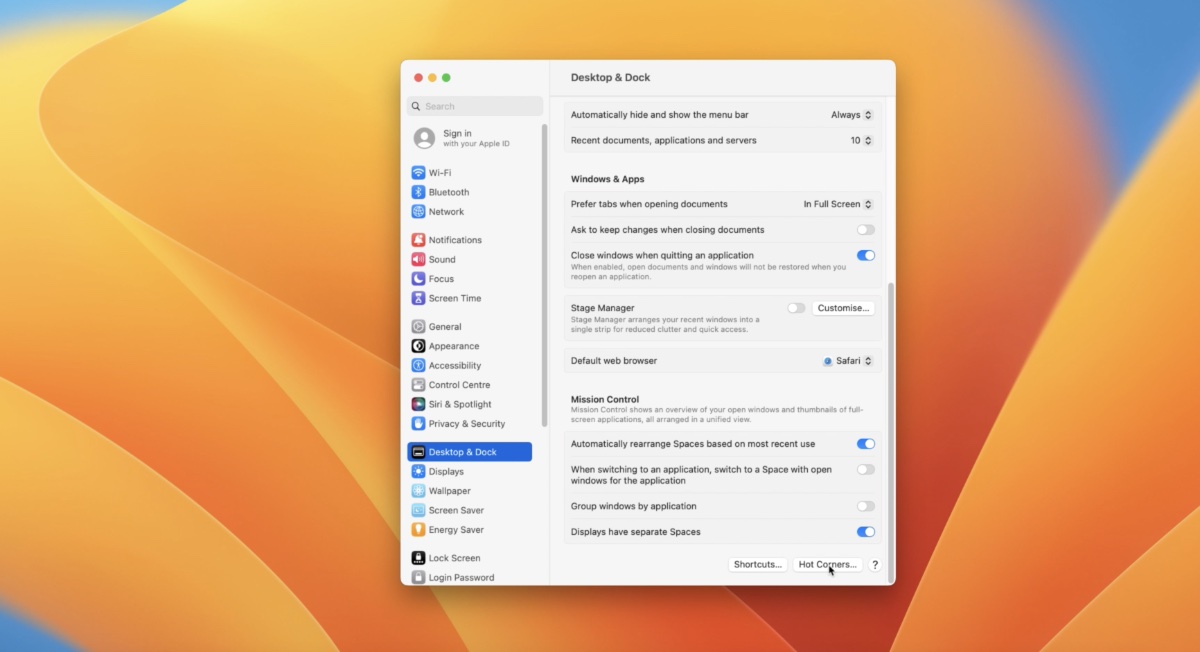
To configure Hot Corners, if your Mac is running macOS 13 Ventura, or later, you open System Settings, then you visit Desktop and Dock, and at the bottom, you will see a button called Hot Corners.
For macOS 12 Monterey or earlier, you open System Preferences, you visit Desktop and Screen Savers, you click on the screensaver tab, and in the bottom right you will see a Hot Corners button.
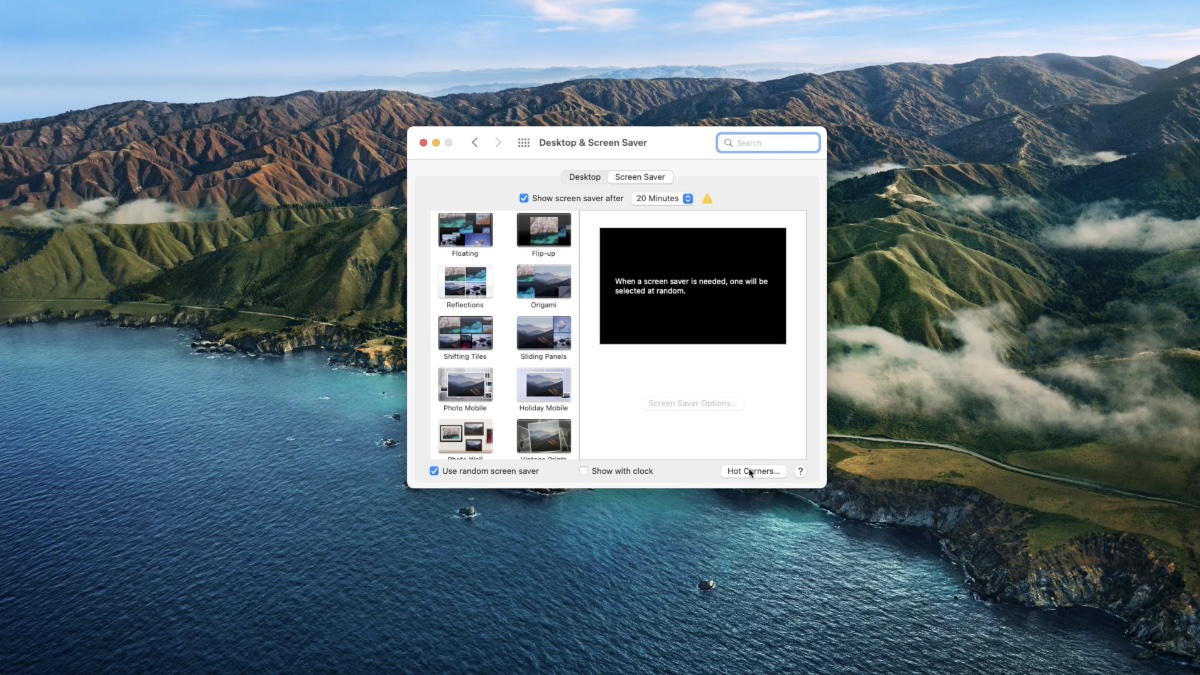
There, you will then be able to configure the actions that that will happen when moving the cursor in any of the four corners, including overriding the quick note option.
So in my case, when I go in the bottom right corner, it doesn’t do quick note, it does: put display to sleep.
Among the options at your disposal, you have Mission Control, hiding all application windows to reveal the desktop, you can activate Notification Center,
you activate Launchpad, which means seeing all the install application on your Mac, you can start the screen saver, etc…
Recap
So to recap, the goal of this episode was to expand on built-in solutions that can help you minimize the number of unnecessary clicks and reduce the cursor travel distance on your Mac.
On top of Folder Pinning and keyboard shortcuts, I’ve talked about App Shortcuts, Mission Control, and Hot Corners.
Next
Now to keep this episode short and sweet, I’ll cover third party utilities that can help you do the same in the next episode, episode 60.
Then after that, I will continue diving deeper on both built-in and third party solutions to combat the last two Mac productivity killers, which are repetitive typing and file clutter.
So that’s it for today.
Again, if you’d like to know how well you are currently coping with the three killers of Mac productivity, head on to macpreneur.com/score to discover your Mac productivity score today.
And until next time, I’m Damien Schreurs, wishing you a great day.
